Published
COIL CARE BASICS
Understanding Your AC Coils
A central air conditioning system contains two coils that work as a team. The evaporator coil sits inside your home, usually within the air handler or above the furnace. As refrigerant circulates through this coil, it absorbs heat from the indoor air. The system then sends the cooled air through your ductwork and into your rooms.
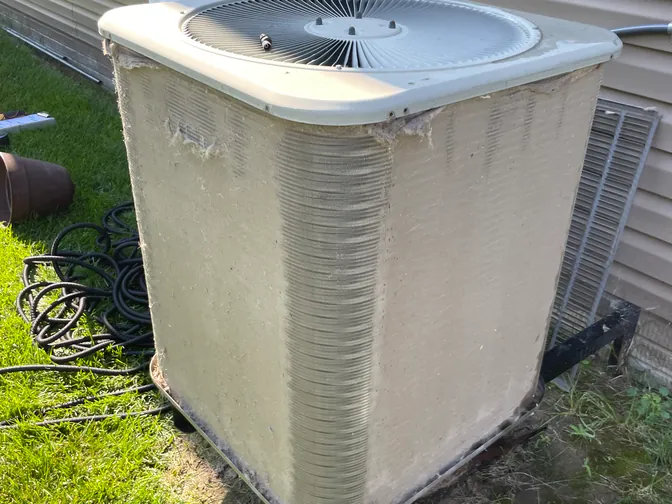
Moisture from the air also condenses on the cold evaporator coil, then drips into a drain pan and leaves through the condensate drain line. The condenser coil is located in the outdoor unit, where it releases the heat the refrigerant carried out of your home. Because it sits outside, the condenser faces constant exposure to dirt, leaves, grass clippings, and storm debris. The evaporator coil is more sheltered, but dust still reaches it when filters are dirty.
Why Clean AC Coils Matter
Clean coils allow heat to move through your air conditioning system more easily. When dirt covers the coils, it acts like insulation—the system still operates, but it must work harder and run longer to cool your home.
Dirty AC coils can contribute to:
- Longer cooling cycles
- Higher energy use
- Weak or inconsistent cooling
- Increased wear on system components
- Frozen evaporator coils
- More frequent repair needs
- Shorter system lifespan
The U.S. Department of Energy and ENERGY STAR recommend cleaning both evaporator and condenser coils as part of regular HVAC maintenance. Regular cleaning helps your system maintain efficiency and can extend equipment life.
Signs Your AC Coils May Be Dirty
Several warning signs may indicate that dirt is interfering with your system:
- The AC runs for a long time without cooling the home
- Airflow from the vents feels weaker than usual
- Your energy bills increase without an obvious explanation
- Ice forms on the refrigerant line or indoor coil
- The outdoor unit is covered in grass, dirt, or plant debris
- The system frequently turns on and off
- Some rooms feel warmer than others
- The air conditioner struggles during the hottest part of the day
These symptoms can have multiple causes, so avoid assuming dirty coils are always responsible. Ice on the indoor coil, for example, can be caused by restricted airflow or a refrigerant problem. Continuing to operate a frozen system can make the situation worse.
Cleaning the Outdoor Condenser Coils
Basic outdoor cleaning is usually the most manageable coil-maintenance task for a homeowner. Here's how to safely remove surface debris without disturbing electrical components:
1. Turn Off the Power
Set the thermostat to the "off" position. Next, shut off power to the air conditioner at the outdoor disconnect box and the appropriate circuit breaker. The outdoor unit contains moving parts and high-voltage electrical components. Confirm that power is fully disabled before touching anything.
2. Clear the Area Around the Unit
Remove leaves, sticks, weeds, mulch, and other material from around the condenser. Trim nearby grass, shrubs, or plants so the unit has adequate space for airflow, and avoid planting anything directly against the condenser.
3. Remove Loose Surface Debris
Put on work gloves and gently remove any large pieces of debris from the exterior. Use a vacuum with a soft-bristle attachment to lift dirt and grass from the coil fins. Move the attachment in the same direction as the fins. Do not scrub aggressively or press the vacuum against them—the thin metal fins bend easily, and bent fins restrict airflow.
4. Apply an Approved Coil Cleaner
When additional cleaning is necessary, use a product specifically labeled for outdoor condenser coils. Follow its directions carefully, including instructions for dilution, application, waiting time, and rinsing. Evaporator and condenser products are not interchangeable.
Never mix cleaning chemicals or use household products that are highly acidic or alkaline. Strong chemicals may corrode the coil or damage nearby materials.
5. Rinse With Low-Pressure Water
Use a regular garden hose with gentle water pressure to rinse away loosened dirt and cleaner. Do not use a pressure washer or a concentrated spray nozzle. High-pressure water can flatten the coil fins, force water into electrical components, and damage the unit.
6. Let the Unit Dry
Allow the condenser to dry before restoring power. Check the area for tools, cleaning materials, or debris, and make sure any removed panels are replaced correctly. Turn the breaker and disconnect back on, then set the thermostat to cooling and confirm the unit starts normally.
Cleaning the Indoor Evaporator Coil
Cleaning an evaporator coil is more difficult because it is usually enclosed within the indoor HVAC equipment. Reaching it may require removing an access panel, disconnecting a drain line, moving wiring, or cutting through sealed material. Homeowners should limit DIY evaporator coil cleaning to light surface maintenance on a coil that is clearly accessible.
1. Shut Off the HVAC System
Turn the thermostat off and shut off electrical power at the breaker. Some systems have separate switches or breakers for the indoor and outdoor equipment, so confirm that both are safely disabled.
2. Locate the Evaporator Coil
The coil is often located in a metal cabinet above the furnace or inside the air handler. Consult the owner's manual or equipment diagram instead of opening random panels. Stop and contact an HVAC professional when the coil is sealed, difficult to reach, surrounded by wiring, or blocked by other components.
3. Remove Loose Dust Carefully
For an accessible coil with light dust, use a soft brush or a vacuum with a soft-bristle attachment. Clean in the direction of the fins and avoid pushing dirt deeper into the coil. Do not use compressed air indoors—it can spread dust and contaminants throughout the equipment area and the rest of your home.
4. Use the Correct Evaporator Coil Cleaner
Some evaporator coil cleaners are designed to be rinsed away by condensation during normal AC operation, while others require manual rinsing. Only use a product approved for indoor evaporator coils and follow every instruction on its label. Avoid saturating insulation, wiring, circuit boards, or furnace components.
5. Inspect the Drain Pan
While the system is off, inspect the drain pan for standing water, sludge, corrosion, or signs of leakage. A clogged condensate drain can cause water to back up around the indoor unit. If the pan is overflowing, the drain line repeatedly clogs, or water is leaking into the surrounding area, schedule professional service.
Common AC Coil Cleaning Mistakes
Coil fins and internal HVAC components are easier to damage than many homeowners realize:
- Using a Pressure Washer: Far too powerful—can bend fins in seconds.
- Cleaning Without Disconnecting Power: Always shut off power at the disconnect and breaker first.
- Scrubbing the Fins: Aggressive scrubbing can bend or tear the fins. Use a soft brush and light pressure.
- Applying the Wrong Chemical: Bathroom cleaners, degreasers, and bleach mixtures can corrode metal or create unsafe fumes.
- Spraying Electrical Components: Keep water and cleaning products away from control boards, capacitors, and wiring.
- Ignoring the Air Filter: Cleaning the coil without replacing a dirty filter lets dust build up again quickly.
- Assuming Cleaning Will Fix Every Problem: Coil cleaning cannot repair a refrigerant leak, failed capacitor, or damaged compressor. Persistent problems need proper diagnosis.
When to Call an HVAC Technician
Call a professional if:
- The evaporator coil is difficult to access
- The coil repeatedly freezes
- You notice oily residue near the coil or refrigerant lines
- The fins are badly bent or corroded
- The drain pan is rusted or leaking
- The system does not cool after basic cleaning
- The circuit breaker repeatedly trips
- You hear hissing, buzzing, grinding, or other unusual sounds
- You are not certain how to disconnect the power safely
- The equipment is still under a manufacturer's warranty
Oily residue can signal a refrigerant leak and requires professional AC repair. Professional maintenance also goes beyond visible surfaces—technicians inspect the coils' full depth and check for developing problems.
How Often Should AC Coils Be Cleaned?
The evaporator coil should generally be inspected at least once a year and cleaned as needed. The outdoor condenser may need more frequent attention when it is exposed to heavy pollen, grass clippings, construction dust, or nearby landscaping. A good routine is inspecting the outdoor unit each cooling season and enrolling in a seasonal maintenance plan before summer's heaviest workload.
Checking your air filter regularly is one of the best ways to limit evaporator coil buildup. Check the filter monthly during periods of heavy use and replace it whenever it appears dirty. Follow the equipment manufacturer's recommendations for replacement intervals.
Questions About AC Coil Cleaning
Light cleaning of accessible outdoor condenser coils is a reasonable homeowner task. Removing debris from around the unit, using a soft brush and vacuum on visible fins, and rinsing gently with a garden hose are safe, straightforward steps. However, opening sealed equipment, working around electrical parts, or deep-cleaning an evaporator coil is better left to a professional.
Pressure washers are far too powerful for AC coils. The concentrated spray can flatten the thin metal fins, bend delicate components, force water into electrical parts, and damage the unit in seconds. Bent fins restrict airflow and reduce cooling performance, and repairing them often requires a professional visit. Always use a regular garden hose with gentle, low-pressure water instead.
Signs include longer cooling cycles, weaker airflow from vents, higher energy bills, ice forming on the indoor coil, and inconsistent cooling throughout your home. Some homeowners also notice a musty smell near the vents. If you notice these symptoms, have a professional inspect your system—dirty coils are one possible cause, but other issues may also be responsible.
No. Bathroom cleaners, degreasers, bleach mixtures, and strong household chemicals can corrode the coil, damage protective coatings, or create unsafe fumes when they react with dust and residue on the coil surface. Only use products specifically approved for the type of coil you are cleaning—evaporator and condenser cleaners are formulated differently and should never be swapped.
Coil cleaning cannot repair underlying electrical, refrigerant, or compressor problems. If the system does not cool after basic cleaning, the unit likely has an issue that surface maintenance can't fix on its own. Schedule a professional inspection so a technician can diagnose the actual cause and recommend the appropriate repair before the problem gets worse.
Most homeowners benefit from professional AC maintenance at least once a year. During this visit, a technician can inspect and clean both coils, test system operation, check the drain line, and identify developing problems before they become expensive repairs. Homes in dusty environments or with nearby landscaping may need more frequent attention.
STAY COOL THIS SEASON
Keep Your AC Coils Running Clean
Keeping your AC coils clean is an important part of home comfort. While light surface maintenance on accessible areas is a task many homeowners can manage, professional cleaning reaches deeper into the system and prevents small problems from becoming major repairs. A trained technician can clean your coils thoroughly, inspect for developing issues, and ensure your system is ready to handle the cooling season.
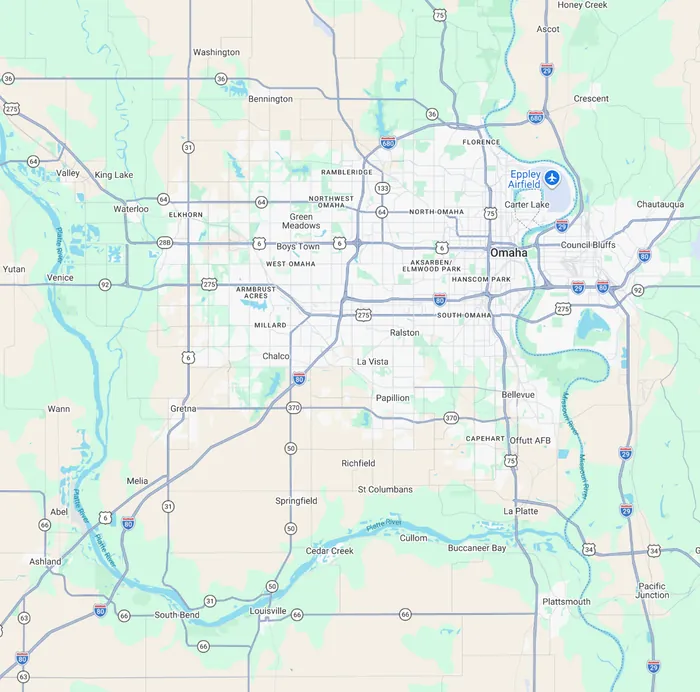
BreezeTech Heating and Cooling serves Papillion, Omaha, Bellevue, Elkhorn, Gretna, La Vista, and surrounding Nebraska communities. Our experienced technicians are skilled in AC maintenance and can inspect, clean, and service your system to keep it running efficiently.
Regular maintenance helps prevent the buildup that reduces cooling and increases energy costs. Whether you need a quick coil cleaning or a full seasonal tune-up, BreezeTech is here to help.